Table of Contents
- Why Skating Speed Starts With Mechanics, Not Just Effort
- How to Increase Hockey Acceleration From the First Stride
- Hockey Explosive Skating Drills You Can Do On and Off the Ice
- Off-Ice Training for Hockey Speed: Building the Engine Behind the Stride
- Equipment and Recovery: The Speed Factors Most Players Ignore
- Using Video Analysis to Self-Correct Your Stride
- Common Mistakes That Kill Skating Speed
- Conclusion
- Frequently Asked Questions
Last Updated: September 25, 2026
Why Skating Speed Starts With Mechanics, Not Just Effort
Hockey skating speed is the product of how you push, not how hard you try. Two players can work equally hard and finish a lap seconds apart, because speed comes from stride mechanics: push-off angle, full extension, and how quickly the recovery leg resets.
How to Increase Hockey Acceleration From the First Stride
To increase hockey acceleration, load the body over the skate, then push at a sharp angle with full hip and knee extension. Acceleration is not a faster top-speed stride, it is shorter, sharper, more aggressive.
Push-Off Angle and First-Step Quickness
Push-off angle is the direction your skate drives into the ice relative to your body. A push too far back or sideways produces noise, not speed.
First-step quickness depends on three things:
- A deep knee bend before the push
- Full extension through the hip at the end of the push
- A fast recovery leg that snaps back under your center of mass
Mental Cues for Explosive Starts
Explosive power responds to simple cues. Most players think too much and move too slowly.
Try these:
- “Push the ice behind me” instead of “skate faster”
- “Low first, fast second” on the first two strides
- “Quiet feet” to stop the choppy, wasted steps
Hockey Explosive Skating Drills You Can Do On and Off the Ice
Hockey explosive skating drills build the two things speed needs: force production and the ability to use that force fast. The best programs pair on-ice stride work with off-ice power training.
On-Ice Drills for Stride Cadence and Full Extension
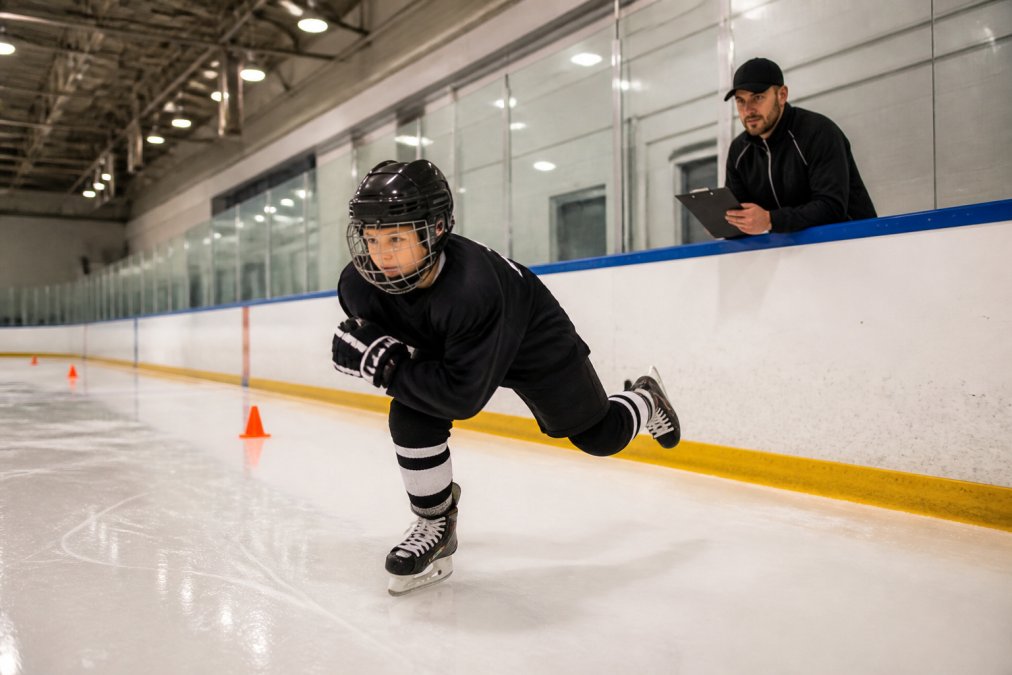
Stride cadence is how often your skates hit the ice per stride cycle. Full extension is how completely your leg finishes each push.
Use these drills:
- Long strides down the wall. Push for full extension, then glide. Focus on finishing each push.
- Ten-stride bursts. Explode for ten strides, then coast. Repeat eight times.
- Crossover ladders. Build lateral movement and edge control through tight turns.
- Backward acceleration starts. Three hard pushes from a standstill, then reset.
Off-Ice Plyometrics for Explosive Power
Plyometrics train the nervous system to fire fast and build the coordination that shows up as first-step quickness on the ice.
A simple weekly set:
- Box jumps: 3 sets of 5
- Broad jumps: 3 sets of 5
- Lateral bounds: 3 sets of 6 per side
- Single-leg hops: 3 sets of 8 per leg
Off-Ice Training for Hockey Speed: Building the Engine Behind the Stride
Off-ice training for hockey speed builds the strength and anaerobic capacity that make a fast stride repeatable. Skating speed fades in the third period when the legs cannot produce force anymore. Dryland work fixes that, but only if it is programmed.
- Lower body power development
- Core stability for balance and body lean
- Glute activation for hip extension
- Age-appropriate loading so athletes develop without breaking down
Strength Work for Glute Activation and Hip Extension
Glutes drive hip extension, and hip extension drives the push. Weak glutes mean a short, choppy stride no on-ice work can fix.
Build them with:
- Trap bar deadlifts: 4 sets of 5
- Bulgarian split squats: 3 sets of 8 per leg
- Hip thrusts: 3 sets of 10
- Single-leg Romanian deadlifts: 3 sets of 8 per leg
How Strength Transfers to the Stride
The transfer is not automatic: lifting heavy does not make you fast unless the strength is expressed at skating angles and speeds. Two rules make it happen:
- Train the hip in extension, not just in the gym. Hip thrusts and deadlifts build raw capacity; single-leg work and lateral bounds teach the hip to fire while balancing on one skate.
- Pair strength with speed in the same session or day. Heavy squats Monday and speed work Friday give the nervous system no reason to convert new strength into fast movement. A short set of accelerations or bounds right after strength work cues the body to use the new force quickly.
Age-Appropriate Loading
Loading guidelines shift with physical maturity, not just chronological age. A rough framework most strength coaches use:
- Under 12: bodyweight and light-implement work. Squats, lunges, hops, medicine-ball throws. Focus on coordination and landing mechanics, not load.
- 12-15 (around peak height velocity): introduce light external load with strict technique, goblet squats, trap bar deadlifts at moderate weight, single-leg work. Avoid maximal lifts during growth spurts, when coordination and joint tolerance are shifting.
- 16+ (post-physical maturity): progressive loading toward heavier compound lifts, paired with plyometrics and sprint work. This is where meaningful strength gains start to show up directly in stride power.
A Sample Weekly Structure
- Day 1, Strength + short speed: trap bar deadlifts, split squats, then 4-6 × 10-second accelerations on or off ice.
- Day 2, Power: box jumps, broad jumps, lateral bounds, medicine-ball throws. Low volume, high intent.
- Day 3, Rest or mobility.
- Day 4, Strength + core: hip thrusts, single-leg RDLs, anti-rotation core work.
- Day 5, On-ice speed: stride work and acceleration, kept short and sharp.
- Days 6-7, Recovery or light skill work.
Adjust volume to the athlete, not the calendar. A 13-year-old and a 19-year-old should not run the same numbers.
Off-ice work does not replace on-ice speed work, it makes it possible. Program strength, power, and recovery together, and the stride gets faster because the engine behind it finally matches the mechanics in front of it.
Equipment and Recovery: The Speed Factors Most Players Ignore
Two things quietly cap skating speed: equipment and recovery. Most players never check either one, yet both are trainable.
Skate Sharpening Profiles and Hollow: The Speed Trade-Off Nobody Explains
Blade geometry changes how much ice your edge bites, how much glide you keep, and how much energy each push costs. Three variables matter most:
- Hollow (radius of hollow, ROH). Measured in inches, this is the groove ground into the blade. A shallower hollow (e.g., 5/8″ or 3/4″) gives more glide and less bite, better for defensemen and players who cover long distances. A deeper hollow (e.g., 1/2″ or 7/16″) bites harder for tight turns and quick stops, but drags on straight-line speed. Most speed-focused forwards settle between 5/8″ and 3/4″.
- Flat Bottom V (FBV). Instead of a single U-shaped groove, FBV grinds a flat center with two angled edges. The result is glide closer to a shallow hollow with bite closer to a deep one. It is a genuine trade-off tool, not a gimmick, but it requires a shop that actually maintains the FBV wheel, inconsistent sharpening erases the benefit.
- Profile (rocker). The curve of the blade from heel to toe. A flatter profile puts more steel on the ice and boosts straight-line stability and glide. A more rockered profile pivots faster for agility. A profile that does not match your stride length will fight you every push.
Boot Stiffness and Fit
A boot too stiff for your weight and strength will not flex enough to let your ankle drive through the push; too soft and it collapses under hard acceleration. Youth and lighter players benefit from a softer flex; heavier, stronger skaters can load a stiffer boot. Fit matters more than stiffness rating, a boot that lets your heel lift loses force on every stride.
Sharpening Schedule
Do not sharpen on a calendar. Sharpen when the edge stops holding on tight turns or the blade slides on hard pushes, for most competitive players, every 6-10 hours of ice time, more often on soft or warm ice. Carry a handheld sharpener for nicks between shop visits, but not as a substitute for a proper grind.
Recovery: The Half of Speed Training Nobody Programs
Speed work is nervous-system work. Sprints, hard accelerations, and plyometrics demand high motor-unit recruitment, and that system needs longer to recover than your muscles do. Stacking hard speed sessions back-to-back is the fastest way to get slower.
A workable weekly structure:
- Hard speed days: 2 per week maximum, separated by at least 48 hours.
- Between them: easy skating, mobility, or low-intensity skill work, nothing that spikes heart rate into sprint territory.
- Sleep: most sport-science guidance points to 8-10 hours for teenage athletes. Sleep is when the nervous system consolidates the adaptations you just trained.
- Hydration and fuel: even mild dehydration measurably reduces power output. Treat water and post-session protein as part of the program, not an afterthought.
- Deload every 3-4 weeks: cut speed volume by roughly half for one week. Players who never deload plateau, then blame their mechanics.
Players who stack speed sessions back-to-back without recovery days often get slower, not faster. The nervous system needs 24 to 48 hours between hard speed sessions to adapt, and teenage athletes often need the longer end of that range.
Track one simple recovery marker, resting heart rate on waking, or how you feel on a 1-5 scale, and log it next to your speed sessions. If the marker trends the wrong way for three days, take an easy day before your next hard session.
Using Video Analysis to Self-Correct Your Stride
Video analysis turns feel into fact. Most players cannot tell you what their stride actually looks like. A phone camera can.
Film from two angles:
- Side view to check knee flexion and full extension
- Behind view to check push-off angle and stride symmetry
Watch for these red flags:
- A recovery leg that swings wide instead of snapping under the body
- A push that finishes early, before the leg is straight
- A body that stands up too early out of the start
Common Mistakes That Kill Skating Speed
The biggest mistakes in speed training are not about effort but direction, timing, and recovery. Here are the ones we see most often.
| Mistake | What It Costs You | Fix |
|---|---|---|
| Skating tall through the start | Weak push-off angle | Bend at the knees and hips before pushing |
| Practicing speed while tired | Reinforces slow, sloppy mechanics | Keep reps short and rest fully between sets |
| Skipping off-ice strength work | Short stride, no hip extension power | Train glutes and hips twice a week |
| Ignoring recovery days | Nervous system never adapts | 24-48 hours between hard speed sessions |
| Never filming your stride | Same errors repeat for years | Film side and rear views weekly |
| Over-training volume | Slower skating, higher injury risk | Prioritize quality reps over long sessions |
Conclusion
Skating speed rewards players who train smart, not just hard. The path runs through better mechanics, sharper acceleration, explosive drills, and the off-ice strength that makes it repeatable.
Frequently Asked Questions
What are the biomechanical keys to increasing hockey skating speed?
The main biomechanical factors are push-off angle, knee flexion, hip extension, and full leg extension on the recovery leg. A deeper knee bend before push-off generates more force production. Extending the pushing leg fully at roughly 45 degrees drives propulsion forward. Keeping your center of mass low and leaning slightly forward helps transfer that force into linear speed. Core stability ties it together so your upper body does not waste energy rotating side to side.
How can players improve their explosive start and acceleration?
Explosive starts come from first-step quickness, not top-end velocity. Work on short-burst accelerations of 3 to 5 strides with full recovery between reps. Off the ice, plyometrics like box jumps and lateral bounds build the neuromuscular coordination behind a fast first step. On the ice, practice starting from a stationary position and driving through the first three pushes without gliding. Mental cues like ‘push the ice behind you’ help players commit to each stride.
What off-ice exercises are most effective for hockey speed development?
Focus on lower body power and core stability. Squats, deadlifts, and hip thrusts build the glute activation and hip extension that power each stride. Plyometric work like jump squats and depth jumps develops explosive power. Single-leg exercises improve balance and stability, which carries directly onto the ice. Add lateral movement drills to train the muscles used in crossover and edge control. Two to three sessions per week with proper recovery is enough to see gains.
How does proper edge control impact overall skating velocity?
Edge control determines how much force you can apply to the ice without slipping. A player with strong edge control can hold a deeper knee flexion angle through the push-off, which means more force production per stride. Weak edges force you to shorten your stride and lose momentum. Practicing tight turns, crossovers, and one-foot glides builds the ankle and hip strength needed for reliable edges, which directly supports faster stride efficiency and higher top-end velocity.