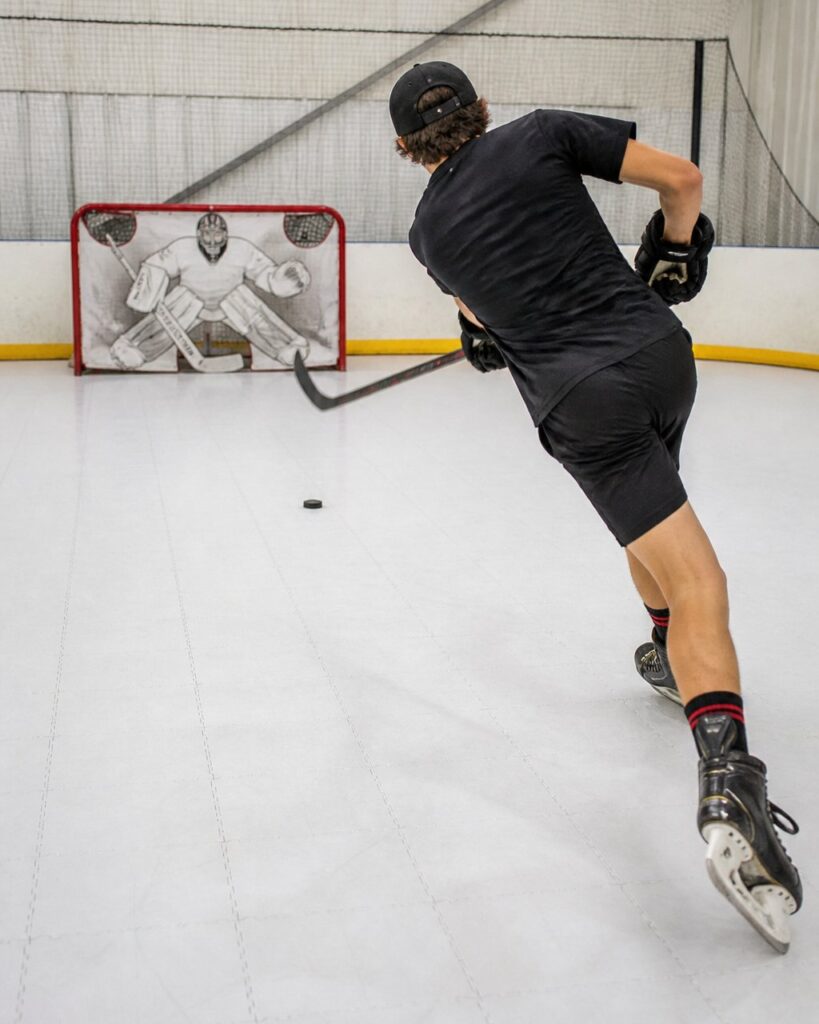
Last Updated: October 26, 2026
Quick Summary
Advanced hockey shooting is built on four repeatable mechanics: grip and hand position, weight transfer, blade angle, and release point. Train each part separately, then rebuild the shot under speed, and measure release time, accuracy, and repeatability every two weeks to confirm the work transfers to games.
- The top hand drives blade angle and release, while the bottom hand guides and stabilizes.
- Shoot off the front foot as it lands so your stride rhythm stays intact at full speed.
- Set a baseline by filming ten shots and counting frames from stick load to puck release.
- Progress through four drill levels, moving up only after passing the threshold twice in a row.
- Aim low blocker, high glove, or five-hole, and change the target every ten reps.
Table of Contents
- What Advanced Shooting Technique Actually Looks Like
- Step 1: Build the Grip, Stance, and Weight Transfer
- Step 2: Snap Shot and Wrist Shot Mechanics for a Quicker Release
- Step 3: Shooting a Hockey Puck in Stride
- Step 4: Advanced Hockey Shooting Drills to Build Power and Accuracy
- Set a Baseline Before You Drill
- Level 1: Loaded Stance Reps (Power Base)
- Level 2: Moving Release (Power Under Motion)
- Level 3: One-Timers and Redirects
- Level 4: Quick Release Under a Timer
- Accuracy Targets That Beat a Goalie
- Adapting the Drills to Ringette
- Hockey Shooting Accuracy Drills for Puck Placement
- Step 5: Off-Ice Hockey Shooting Practice That Transfers to Games
- Diagnosing Your Shot by Where the Puck Goes
- Book a Shooting Assessment at Pro Stride Hockey
- Frequently Asked Questions
What Advanced Shooting Technique Actually Looks Like
Advanced hockey shooting is not about shooting harder. It is about releasing the puck faster, from stranger positions, with the blade doing exactly what your hands tell it to do. At Pro Stride Hockey, we build advanced hockey shooting techniques around repeatable mechanics rather than raw effort.
Most players stall because they practice the same comfortable shot. A better approach is to break the shot into parts, train each part, then rebuild it under speed.
The Four Mechanics That Decide Every Shot
Four things control every release:
- Grip and hand position on the stick
- Weight transfer from back foot to front foot
- Blade angle at the moment of contact
Fix these four and the puck goes where you look. Leave them alone and no amount of extra practice will help.
Hockey Canada’s player development resources frame skill work in progressive stages, which is exactly how we structure shooting development.
Step 1: Build the Grip, Stance, and Weight Transfer
Start with the body, not the puck. A shot begins in the feet and travels up through the hips, shoulders, and hands.
Set your stance with knees bent and weight on the balls of your feet. Keep your top hand firm and your bottom hand loose enough to let the stick rotate.
Top Hand, Bottom Hand, and Blade Angle
The top hand drives the shot. It pulls back and rolls the blade over at release. The bottom hand guides and stabilizes. For a focused breakdown of grip hand positioning and elbow placement, see our dedicated guide.
- Top hand: controls blade angle and release
- Bottom hand: controls pressure and direction
- Blade: should close over the puck at contact
A common mistake is squeezing the bottom hand too hard. That locks the blade and kills the release.
Step 2: Snap Shot and Wrist Shot Mechanics for a Quicker Release
The snap shot wins games because it hides the release. There is no big windup, so goalies cannot read it.
Load the stick by pressing the blade into the ice, then snap the top hand back and down.
The wrist shot uses a longer sweep.
- Snap shot: short load, fast release, best off the rush
- Wrist shot: more windup, more accuracy, best from distance
- Backhand: hardest to read, worth learning early
Keep the release point in front of your body. Behind your front foot, the shot loses power.
Step 3: Shooting a Hockey Puck in Stride
Shooting a hockey puck in stride means releasing the puck without breaking your skating rhythm. Most players slow down to shoot.
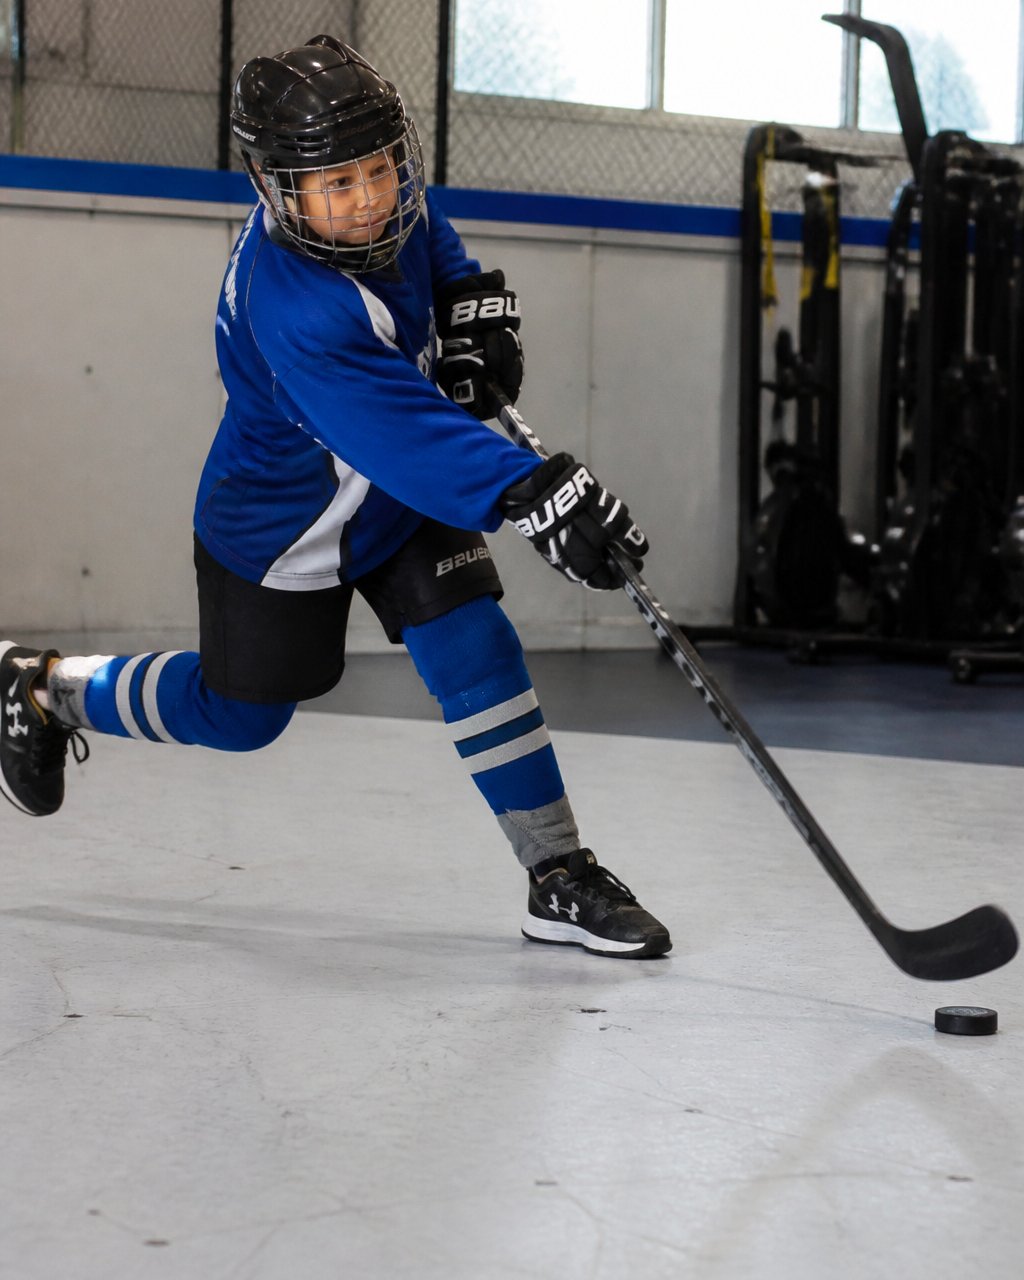
The key is to shoot off the front foot as it lands. Catch the puck in the middle of your stride and let the momentum add power.
Practice this at half speed first. Add speed only when the release stays clean.
Step 4: Advanced Hockey Shooting Drills to Build Power and Accuracy
Advanced hockey shooting drills should train power and accuracy together, not separately. Our hockey shot power training builds harder, quicker releases through mechanics, sequencing, and stability. A hard shot that misses the net is a turnover. The drills below are organized as a progression: start at Level 1, and only move up when you can hit the target threshold at the current level on two consecutive sessions.
Set a Baseline Before You Drill
Before your first rep, measure three things so you have something to beat:
- Release time: film ten shots from the moment the stick loads to the moment the puck leaves the blade. Count frames. Most phones shoot at 30 or 60 frames per second, so the math is simple.
- Accuracy: pick one corner and count hits out of ten.
- Repeatability: count how many of ten shots land within roughly a stick blade of each other. Tight clusters mean repeatable mechanics; scattered pucks mean the blade angle is changing shot to shot.
Write the three numbers down. Re-test every two weeks. This is the part most players skip, and it is the reason their practice does not transfer.
Level 1: Loaded Stance Reps (Power Base)
- Sets and reps: 3 sets of 10 snap shots from a stationary loaded stance, blade pressed into the surface before each release.
- Focus: feel the stick flex load, then release. Do not add speed yet.
- Pass threshold: eight of ten shots hit the same half of the net.
Level 2: Moving Release (Power Under Motion)
- Sets and reps: 3 sets of 8 shots taken while striding, releasing off the front foot as it lands.
- Focus: the release must not break your stride rhythm. If you slow down to shoot, drop back to Level 1.
- Pass threshold: release time within one frame of your Level 1 baseline while moving.
Level 3: One-Timers and Redirects
- Sets and reps: 3 sets of 8 one-timers off a rebounder or wall, alternating the incoming angle each rep.
- Focus: catch the pass in the middle of the blade and redirect rather than wind up. This is the shot that beats a set goalie.
- Pass threshold: six of eight one-timers on net from a changing angle.
Level 4: Quick Release Under a Timer
- Sets and reps: 4 sets of 6 shots with a 1.5-second cap from receive to release.
- Focus: decision speed. Pick a corner before the puck arrives.
- Pass threshold: all six releases under the cap with at least four on target.
Accuracy Targets That Beat a Goalie
Puck placement beats power in tight. Aim for corners, not the middle of the net.
- Low blocker: hardest save for most goalies because the stick hand has to travel farthest and lowest.
- High glove: works when the goalie drops early; release it late so the glove is already committed down.
- Five-hole: only when the goalie is already moving laterally, never as a default.
Change the target every ten reps so you learn to adjust rather than groove one shot. Track hits per target in a notebook or notes app, the pattern of which corner you miss tells you which mechanic is drifting.
Adapting the Drills to Ringette
Ringette players shoot a ring, not a puck, and the ring behaves differently: it sits flatter, it does not roll the same way, and the release has to lift it cleanly off the surface. Use the same four-level progression, but swap the puck for a ring and shorten the load phase, the ring rewards a quicker, flatter release and punishes a long windup.
Film one set per session from the side. Side-on footage shows weight transfer and blade angle far better than a front view, and it is the fastest way to catch a blade that opens early.
Hockey Shooting Accuracy Drills for Puck Placement
Once the four levels are clean, layer accuracy work on top:
- Corner call: a coach or partner calls the corner after the puck arrives, forcing a late adjustment.
- Ten-in-a-row: hit the same corner ten times before switching. Miss and the count resets.
- Pressure reps: shoot the last rep of every set with a partner closing on you, so the release has to happen early.
Step 5: Off-Ice Hockey Shooting Practice That Transfers to Games
Off-ice hockey shooting practice works when it copies game conditions. Shooting from a standstill builds a standstill shot. The variables below are the ones that actually change whether your off-ice reps show up in a game, most players ignore them and then wonder why their shot looks different on ice.
Match the Surface to the Skill
- Shooting pad or synthetic tile: best for puck control and release work. The puck slides predictably, so you can groove blade angle without fighting friction.
- Concrete or garage floor: usable for stickhandling and light reps, but it chews up stick blades and changes how the puck rolls. Do not judge your release on concrete.
- Skating treadmill stride work: the closest off-ice match to shooting in stride, because your feet are actually moving under you. Shoot off the front foot as it lands, exactly as you would on ice.
Never shoot a puck at a wall, garage door, or net without eye protection and a clear backdrop. Pucks ricochet off edges and posts, and a deflected puck off a hard surface is the most common off-ice shooting injury. Wear a helmet with a cage or a full face shield, and check that nothing breakable sits behind the target.
Equipment Variables That Change Your Shot
Stick length, flex, and curve are not preferences, they change the mechanics you are trying to train.
- Flex: a stick that is too stiff for a youth player will not load, so the blade never presses into the surface and the shot loses its zip. A stick that is too whippy releases late and scatters accuracy. The right flex is the one a player can bend with a normal snap-shot load, not a maximum-effort one.
- Length: an overly long stick forces the hands higher and flattens the blade angle at contact. Cut in small increments and re-test accuracy after each cut.
- Curve: a more open curve lifts the puck more easily but makes the low, hard shot harder to control. A flatter curve rewards a clean release. Match the curve to the shot you actually take most often.
Build Transfer With These Variables
Train these variables every session:
- Shoot in motion with a shooting pad or treadmill stride work, never only from a standstill.
- Change the angle every rep so the release adapts to a moving target.
- Add a timer to force a quick release, and log the release time against your on-ice baseline.
Measure Whether It Transferred
Off-ice practice only counts if the numbers move on ice. Every two weeks, re-test release time, accuracy out of ten, and repeatability (how tightly ten shots cluster). If off-ice numbers improve but on-ice numbers do not, the surface or the equipment is the likely culprit, check the pad, the flex, and the lie before adding more reps.
Ringette Off-Ice Notes
Ringette players should practice the ring on the same pad, but expect different behavior: the ring sits flatter and does not roll, so the release has to lift it cleanly rather than roll it up the blade. Shorten the load phase and focus on a flat, quick release.
Our specialized shooting lane facility gives players focused reps with immediate feedback.
Diagnosing Your Shot by Where the Puck Goes
Where the puck misses tells you what to fix. Use this table to read your own results.
| Where the puck goes | Likely cause | Fix |
|---|---|---|
| High and wide | Blade opens too early | Roll the top hand later |
| Low and weak | No weight transfer | Land on the front foot at release |
| Wide left or right | Bottom hand too tight | Loosen grip, guide with top hand |
| Off the heel | Puck too far back | Move puck toward the middle of the blade |
| No zip | Blade never loads | Press into the ice before release |
Track ten shots per session. Patterns show up fast.
Book a Shooting Assessment at Pro Stride Hockey
Advanced hockey shooting comes down to mechanics you can measure and repeat.
We also build stride technique on a skating treadmill, so your shot and your speed improve together. One parent, Tara Mayne, told us her son “perfected his stride and my daughter gained confidence with her ringette shot.”
Ready to see where your shot stands? Book Now and start training the details that score goals.
Frequently Asked Questions
How do you shoot a hockey puck while skating?
Start the shot while you are still moving, not after you stop. Receive the puck on your back foot, then transfer weight to your front foot as you release. Keep the top hand away from your body so the stick can flex, and let the puck roll from heel to toe off the blade. Practicing shooting a hockey puck in stride on an off-ice surface builds the timing so the release happens without breaking your stride.
What are the best advanced hockey shooting drills?
The drills that work best combine movement, a target, and a repeatable rep count. Try pull-and-release reps across the body, in-tight snap shots from five metres, and shooting off a pass while skating. Set a target in each corner and track how many of ten reps hit it. Advanced hockey shooting drills should always include a decision, such as shooting off a lateral step, so the skill carries into game situations.
How often should youth hockey players practice shooting?
Short, focused sessions beat long ones. Three to four off-ice sessions a week of 15 to 20 minutes, with a specific target each time, will build a repeatable release faster than one long session. Quality matters more than volume: stop when form breaks down. Off-ice hockey shooting practice with a coach or video feedback speeds this up because someone can spot the mechanical cause of a missed shot.
Can off-ice training improve hockey shooting?
Yes, when the practice mirrors the game. Off-ice reps let you take far more shots than ice time allows, and a shooting lane lets you work on blade angle, weight transfer, and release without waiting for ice. Add video analysis so you can see whether the puck is coming off the heel or the toe. Pairing off-ice shooting work with skating treadmill stride work gives you the full picture of speed and shot.
Your shot will not fix itself in warmups. It takes structured reps, honest feedback, and a coach who pushes you past your comfort zone. Pro Stride Hockey offers video analysis, a dedicated shooting lane, and small-group coaching built for real improvement. Get started with Pro Stride Hockey and turn your release into a weapon.
