Table of Contents
- What Makes Youth Hockey Training in Edmonton Actually Work
- Private Hockey Lessons for Kids: When One-on-One Coaching Pays Off
- Group Hockey Training for Youth: Small Groups, Big Gains
- Off-Ice Hockey Training for Kids: Building Speed and Power Away From the Rink
- Hockey Skating Treadmill Training: What It Is and Why It Works
- How to Choose the Best Youth Hockey Training Edmonton Families Trust
- Conclusion: Matching Your Player’s Goals to the Right Program
- Frequently Asked Questions
Last Updated: October 16, 2026
What Makes Youth Hockey Training in Edmonton Actually Work
The best youth hockey training in Edmonton is built on one principle: more reps with eyes on you.
Most families are not short on options, they are short on information. Program pages list dates and ages but rarely explain what happens in a session, who is coaching, or how many players share one instructor.
Youth hockey training is structured instruction outside team practice that targets individual skills: skating stride, edge control, puck handling, shooting, and decision-making at speed.
The single biggest predictor of improvement is how many corrected repetitions a player gets per session. Ask any program for its player-to-coach ratio before you register.
Private Hockey Lessons for Kids: When One-on-One Coaching Pays Off
Private hockey lessons for kids make sense when one specific problem blocks everything else: a weak first three strides, a shot that never leaves the ice, a confidence dip after a tough season.
At Pro Stride Hockey, our one-on-one sessions run at a 2:1 player-to-coach ratio, so a second coach can work a second player on the same ice without either athlete losing attention.
Group Hockey Training for Youth: Small Groups, Big Gains
Group hockey training for youth delivers most of the benefit of private coaching at a lower cost per player, provided the group stays small. Past six or seven players, the instructor manages instead of teaching.
A common mistake parents make is registering for the largest camp with the lowest per-hour rate. Do the math on attention instead: a 90-minute session with 30 players and three coaches gives each player roughly nine minutes of individual feedback, while a 60-minute session with four players and two coaches gives each player far more.
| Format | Typical Group Size | Attention Per Player | Best For |
|---|---|---|---|
| Private lesson | 1-2 players | Highest | Fixing one specific flaw |
| Small-group session | Up to 4 players | High | Skill building with peer push |
| Large camp | 20+ players | Lowest | Exposure, fun, volume of ice time |
Off-Ice Hockey Training for Kids: Building Speed and Power Away From the Rink
Off-ice hockey training for kids builds the physical base that on-ice skill sits on top of. Ice time is limited and expensive; dryland work is neither. What separates off-ice training that transfers to games from training that just makes a kid tired comes down to three things: movement specificity, load progression, and how the work is measured.
Movement specificity: train the stride, not the gym
The off-ice work that transfers best mimics the skating stride. That means:
- Lateral bounds and skater hops, train the push-out direction of the stride and the hip abduction that holds an edge.
- Single-leg strength work (split squats, single-leg Romanian deadlifts, step-ups), a player who cannot hold a deep single-leg position off the ice will struggle to hold an edge on it.
- Hip mobility and ankle stiffness drills, edge control lives in the ankle and hip, not the knee.
Generic gym time, long runs, heavy bilateral lifts, machine circuits, builds a general athlete but does little for a stride that breaks down at top speed.
Load progression: how much, how often
A common pattern among youth strength coaches is to run off-ice work in blocks of 4-6 weeks, changing one variable at a time. A simple structure for players ages 10 and up:
- Weeks 1-2, Movement quality. Low load, high attention to position. Bodyweight and light resistance only.
- Weeks 3-4, Add load or speed. Same movements, more resistance or faster tempo.
- Weeks 5-6, Add complexity. Combine movements (lateral bound into a sprint, single-leg squat into a shot), or add a reactive cue.
Two or three sessions a week is enough for most youth players. More is not better if recovery and sleep are not there.
Shooting: reps, feedback, and the ringette parallel
Shooting is a motor pattern, and patterns need repetition. Off-ice shooting lanes let a player take 200 shots in the time it takes to take 40 on the ice. But raw reps without feedback just groove whatever the player is already doing. The productive version is:
- Blocked reps, same shot, same spot, 20-30 in a row, focused on one cue (release point, weight transfer, follow-through).
- Varied reps, change angle, change distance, change shot type every few reps so the pattern holds under different conditions.
- Video check every few weeks, film from the side. Most players cannot feel a slow release, but they can see it.
Film the shot from the side every few weeks. Most players cannot feel a slow release, but they can see it. Video turns an invisible habit into an obvious one.
For ringette players, the same principles apply to ring release and passing. The need for repeated, coached reps does not change. A ringette player who trains ring release off the ice with the same blocked-then-varied structure sees the same transfer.
How to tell it is working
Off-ice progress should show up on the ice within 6-10 weeks if the work is specific. Markers to watch:
- First three strides, quicker to top speed, less head bob, more push per stride.
- Edge holds, player can hold a tight turn without losing the edge or standing up.
- Shot release, faster release, more consistent weight transfer, puck (or ring) comes off the same way under pressure.
If none of those change after two months of consistent off-ice work, the issue is usually specificity (wrong exercises) or progression (same load every week), not effort.
Off-ice training only transfers when it looks like skating, gets progressively harder, and is checked against on-ice markers. Generic gym time does not count.
Hockey Skating Treadmill Training: What It Is and Why It Works
Hockey skating treadmill training puts a player on a motorized, curved or inclined surface that mimics ice, letting a coach slow the stride down, freeze it, and rebuild it rep by rep.
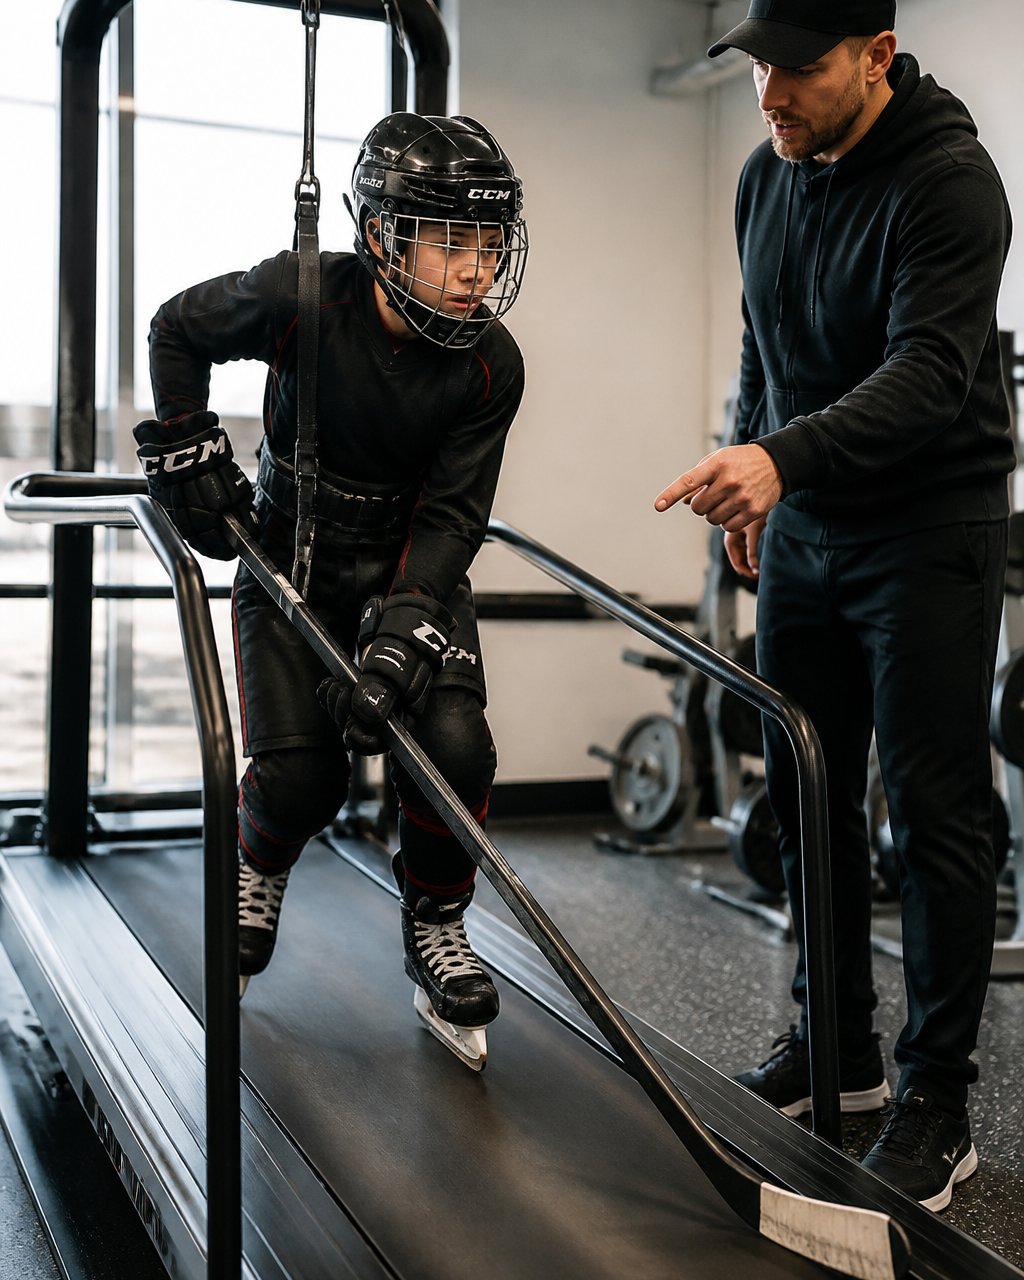
Why it works comes down to feedback. On ice, a stride flaw flashes past in half a second.
One of our clients, Lindsay Axelson, put it plainly: “I’d never been on a skate treadmill before and Adrienne taught me a lot about stride efficiency.”
The tool is not magic on its own. A treadmill without a coach watching is just a treadmill.
How to Choose the Best Youth Hockey Training Edmonton Families Trust
Most program pages tell you dates, ages, and location. Almost none tell you what actually decides whether your player improves. This section is a decision guide: match the player’s goal to the format, then verify the program can prove progress.
Step 1: Name the goal before you shop
“Get better at hockey” is not a goal you can evaluate a program against. Narrow it down:
- Fix one specific flaw (weak first three strides, shot that never leaves the ice, loses edges on tight turns) → private or 2:1 instruction.
- Build general skill with peer push → small-group sessions capped at four to six players.
- Add speed, power, and shot volume away from the rink → off-ice and shooting-lane work.
If you cannot name the goal in one sentence, ask the program to help you name it before you register.
Step 2: Match the format to the goal
| Player goal | Best-fit format | What to verify |
|---|---|---|
| Fix one specific flaw | Private or 2:1 lesson | Coach can describe the flaw and the correction plan |
| Build skill with peers | Small-group session (4-6 cap) | Ratio in writing, session plan shared |
| Add speed and shot volume | Off-ice + shooting lane | Specific exercises, progression over weeks |
| Rebuild stride mechanics | Skating treadmill | Coach controls speed, uses video, corrects every rep |
| Tryout preparation | Combined block | Game-speed drills, not just isolated skills |
Step 3: Ask the five questions that actually matter
- What is the player-to-coach ratio? Anything above 6:1 means your player spends most of the session unsupervised. Ask for it in writing.
- What happens in a session? Ask for a sample session plan, drills alone are not enough; you want to know how skills get applied at game speed.
- Who is coaching, and what is their background? A strong program answers without hesitation and can describe the coach’s playing or certification history.
- How do you track progress? Look for video review, stride analysis, or measurable benchmarks rather than vague encouragement.
- What is the commitment? Ask about session length, weekly frequency, and whether you can start with a single session before committing to a block.
Do not judge a program by the size of its facility or the number of camps it runs. A packed camp with a 30:1 ratio is a babysitting service with ice. Ask for the ratio in writing.
Step 4: Demand measurable progress tracking
This is the gap almost every program page skips. “We develop players” is not a tracking system. Ask what the program actually measures and how often you see it. Reasonable answers include:
- Baseline video at the first session, then a re-film at a set interval (4-8 weeks) so the player and parent can see the change.
- Stride analysis, frame-by-frame review of push direction, knee angle, and recovery.
- Shot metrics, release time, weight transfer, and consistency under different angles.
If a program cannot describe its tracking in one or two sentences, assume there is none.
Step 5: Weigh cost against corrected reps, not hours
The right comparison is not cost per hour, it is cost per corrected repetition. A 90-minute session with 30 players and three coaches gives each player roughly nine minutes of individual feedback; a 60-minute session with four players and two coaches gives each player far more. Compare programs on that basis and the math usually flips.
A note on team coaching
A parent asked us recently how we differ from a competitive team’s own coaching. The honest answer: we do not replace it. Team practice builds systems, chemistry, and game sense; individual training builds the skating and shooting mechanics that make a player effective inside those systems. The two stack. For families worried their child is not “elite” enough, recreational but motivated players often see the biggest gains, because the gap between their current stride and a correct one is wide and fixable.
Choose by goal, verify the ratio and the tracking, and compare cost per corrected repetition, not cost per hour. Those four checks eliminate most of the wrong programs before you ever pay a deposit.
Conclusion: Matching Your Player’s Goals to the Right Program
The right program depends on what your player needs. A specific flaw calls for private lessons. General skill building calls for small-group sessions.
Pro Stride Hockey runs all four under one roof, with a 2:1 ratio in one-on-one sessions, a four-player cap in groups, video analysis, a dedicated shooting lane, and a partnership with the Tim Turk training program.
Book a session with Pro Stride Hockey and give your player the corrected repetitions that team practice cannot provide.
Frequently Asked Questions
Is private or group hockey training better for young players?
It depends on your player’s goals and personality. Private hockey lessons for kids work well when a player needs to fix a specific technique issue, like stride inefficiency or a weak shot release, because the coach can give full attention to every rep. Group hockey training for youth suits players who thrive on competition and want game-like reps. Many families use both: private sessions to build a skill, then small-group sessions to apply it under pressure. Look for programs that keep group sizes small enough for real feedback.
Can off-ice training improve skating and shooting?
Yes, and it often accelerates progress because you can isolate movement patterns without ice conditions or puck battles getting in the way. Off-ice hockey training for kids can target stride mechanics on a skating treadmill, shooting mechanics in a dedicated lane, and conditioning that carries over to late-game situations. The key is coaching quality: a treadmill or shooting lane only helps if someone is correcting technique rep by rep. Ask any program how they track whether a player’s stride or shot is actually changing.
How often should a young hockey player train?
Most youth players see steady progress with two to three focused sessions per week during the season, plus their regular team practices and games. During the off-season, frequency can increase, but recovery matters, especially for growing bodies. The right number depends on age, current training load, and goals. Ask a program how they structure sessions and whether they adjust volume for players who are also in a competitive season. More is not always better if technique breaks down from fatigue.
What should parents look for in a youth hockey coach?
Look at player-to-coach ratios, how the coach communicates with kids, and whether the program explains its method. A 2:1 ratio in one-on-one sessions or a maximum of four players per group means your child gets corrected on nearly every rep. Ask whether the coach has experience with your player’s age group and skill level, from beginner to elite. Also ask how progress is measured, whether through video analysis, timed drills, or skill benchmarks, so you know improvement is real and not just a feeling.