Table of Contents
- Why Shooting Lane Training Matters for Youth Hockey Players
- Off-Ice Hockey Shooting Drills for Youth: Building Accuracy and Consistency
- Hockey Shooting Practice at Home: Setting Up Your Own Training Space
- Proper Hockey Shooting Technique for Kids: Mechanics That Translate to Games
- Off-Ice Hockey Shooting Practice Duration: How Long and How Often
- Building Muscle Memory Through Focused Repetition
- Measuring Progress and Transferring Skills to Game Performance
- Frequently Asked Questions
Last Updated: October 18, 2026
Why Shooting Lane Training Matters for Youth Hockey Players
Youth hockey players face a common challenge: improving shooting accuracy and power when ice time is limited. A shooting lane training approach gives young athletes a structured way to develop their shot without waiting for ice time. Pro Stride Hockey offers resources and training aids to help establish effective off-ice shooting practice.
Focused off-ice shooting practice can transform a player’s confidence and performance. The reason is simple. Shooting lane training removes distractions and lets players repeat the same motion hundreds of times with immediate feedback.
What sets shooting lane training apart is intentional focus. Players work on specific mechanics, target accuracy zones, and build power through proper weight transfer. The repetition and feedback loop accelerates skill development far faster than sporadic ice practice.
Shooting lane training benefits youth players by creating a distraction-free environment where proper technique can be repeated and reinforced until it becomes automatic.
Off-Ice Hockey Shooting Drills for Youth: Building Accuracy and Consistency
Off-ice hockey shooting drills for youth work because they isolate the shooting motion from the chaos of a live game. Young players can focus entirely on mechanics without worrying about defenders, ice conditions, or split-second decisions.
The key is choosing drills that build both accuracy and consistency. A player who can hit the same spot 50 times in a row is ready for game situations.
Target-Based Accuracy Drills
Target-based accuracy drills teach young players where their shot is going and why. These drills work best when players have clear visual targets to aim at.
Set up marked zones representing game-realistic scoring areas. Have players shoot at specific targets, top shelf, low blocker side, far post, starting close and increasing distance as accuracy improves.
Start with larger targets and shrink them as skill improves, building confidence early while maintaining challenge.
Use colored tape or markers to create target zones on your shooting lane wall. Change the targets weekly to keep drills fresh and prevent boredom.
Shot Placement and Decision-Making Drills
Shot placement drills teach young players that accuracy matters more than power. A soft shot in the right spot beats a hard shot that misses.
Set up scenarios where players choose a target based on a simple rule, such as “forehand shoots top shelf, backhand shoots low.” This builds decision-making speed alongside accuracy.
Add time pressure gradually, no limit first, then a clock, so players learn to decide faster and execute under pressure.
Hockey Shooting Practice at Home: Setting Up Your Own Training Space
Hockey shooting practice at home doesn’t require expensive equipment. A small dedicated space, basic protective barriers, and proper safety setup are all you need to build serious shooting skills.
Choose a space at least 4.5 meters long and 2.4 meters wide, a basement corner, garage, or covered outdoor area. Pro Stride Hockey offers a variety of training aids that can enhance even a small space.
Start with a stick, pucks or training balls, and targets. As players progress, add aids like shooting lane platforms or alignment markers that reinforce proper stance.
Never set up a shooting practice area where pucks could travel into living spaces or hit people. Always use proper containment and safety barriers. Stray pucks cause injuries and property damage.
Proper Hockey Shooting Technique for Kids: Mechanics That Translate to Games
Proper hockey shooting technique for kids builds the foundation for powerful, accurate shots that work in real games. Young players who learn correct mechanics early develop habits that stick with them as they advance.
The shooting motion has three critical components: weight transfer, core engagement, and follow-through. Skip any one and the shot loses power, accuracy, or both.
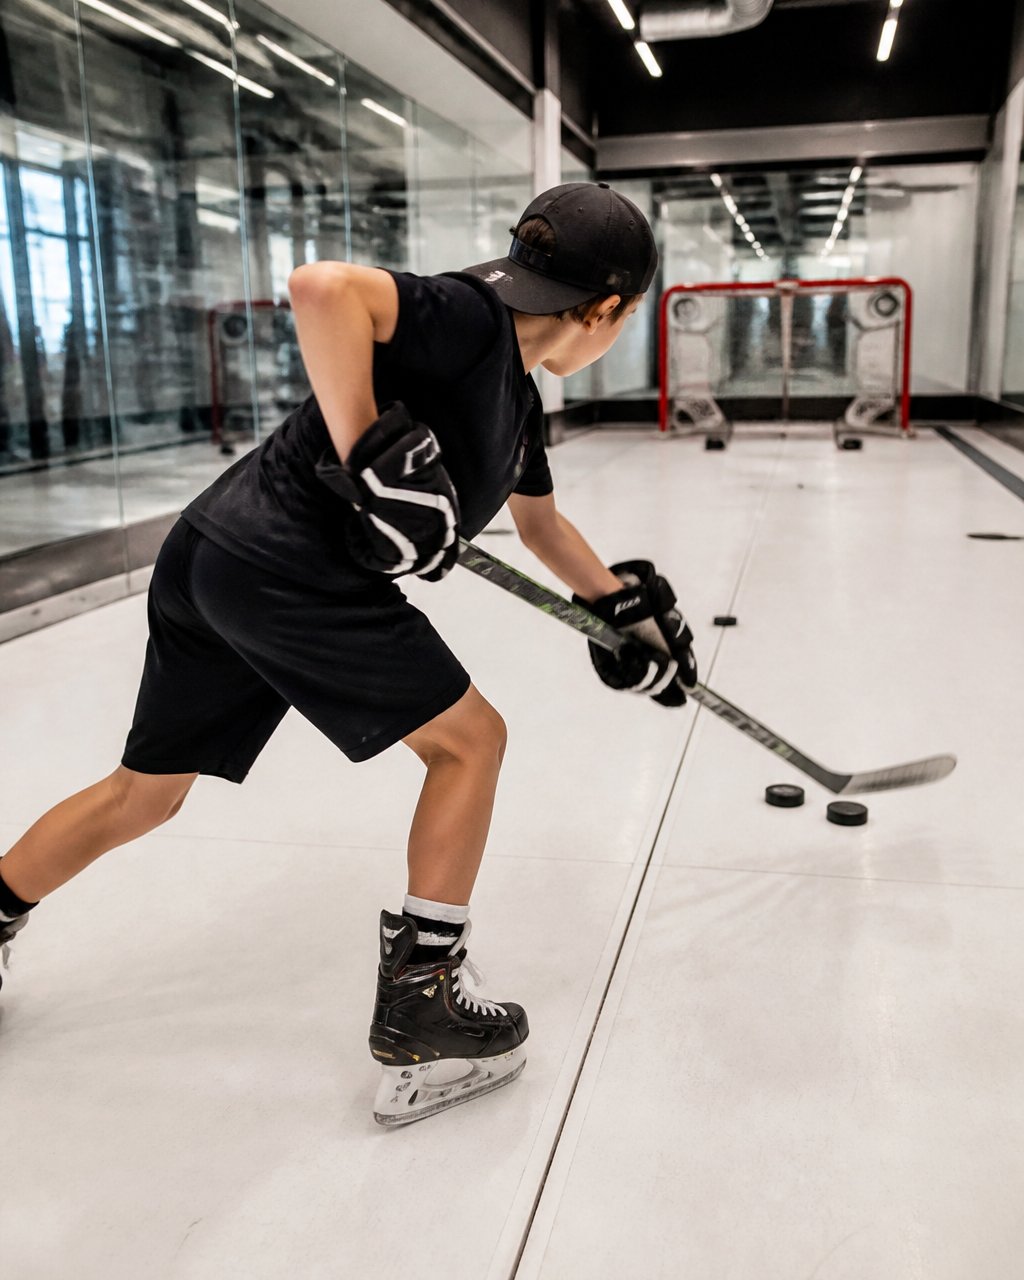
Mastering these fundamental mechanics requires a consistent focus on proper shooting posture, which serves as the essential foundation for every young player aiming to develop a more powerful and accurate release.
Weight Transfer and Core Engagement
Weight transfer is where shooting power comes from.
Start with feet shoulder-width apart, back foot slightly behind the front.
The core stays engaged throughout, a loose core wastes the power generated by the legs. Teach players to feel their core tighten as they load and follow through.
Common mistake: leaning back instead of transferring weight forward, which kills power and accuracy.
Release Speed and Follow-Through
Release speed determines how quickly the puck reaches the net, giving the goalie less time to react.
The follow-through completes the motion and transfers energy fully to the puck. A short, incomplete follow-through wastes energy, so teach players to extend fully toward the target.
Practice each component in isolation: 20 shots focused only on quick release, then 20 on complete follow-through, before combining them.
Off-Ice Hockey Shooting Practice Duration: How Long and How Often
Off-ice hockey shooting practice duration matters because quality beats quantity. A 30-minute focused session beats a two-hour unfocused one every time. But the right length and frequency change with age, attention span, and the rest of a young player’s weekly load. A practical age-banded plan removes the guesswork.
Age-Banded Session Length and Frequency
Use these ranges as starting points, then adjust to the individual player. A player who is new to structured shooting will tire faster than one who has trained for a season.
- Under 8: 15-20 minutes, two times per week. Keep drills simple, one target, one mechanic per session. Attention spans are short, so stop while the player is still enjoying it.
- Ages 8-10: 20-30 minutes, two to three times per week. Introduce two targets and a simple decision rule (forehand high, backhand low).
- Ages 11-13: 30-40 minutes, three times per week. Add time pressure, moving start points, and video review of one mechanic per session.
Cap any single shooting block at 60 minutes regardless of age. Beyond that, fatigue degrades technique and reps build bad habits instead of good ones.
Structuring Each Session
Every session should follow the same shape so young players know what to expect:
- Warm-up (5 minutes): easy wrist shots from close range to loosen the wrists, hips, and shoulders. No targets, no pressure.
- Focused drill work (15-30 minutes depending on age): one or two mechanics only. For example, 10 minutes on weight transfer without a puck, then 10 minutes on release speed with a puck.
- Game-realistic block (5-10 minutes): add a decision rule, a time limit, or a moving start point.
- Cool-down (5 minutes): free shooting at a large target to finish on success and build confidence.
Balancing Shooting With Skating, Passing, and Rest
Shooting reps should not crowd out the rest of a young player’s development. Off-ice skating treadmill work and shooting practice can share a session, but keep total training time age-appropriate and avoid stacking high-volume shooting on a hard on-ice practice day. Pro Stride Hockey’s training philosophy emphasizes a balanced approach to skill development.
Watch for overuse signals: soreness that lingers more than a day, a drop in accuracy late in a session, or a player who stops asking to shoot. Those are signs to cut volume and add rest, not to push through.
Schedule shooting sessions on non-practice days when possible. That spreads the weekly load and gives the nervous system time to consolidate the movement pattern between sessions.
Match session length and frequency to age, keep every session under 60 minutes, and balance shooting reps with skating, passing, and rest. Consistent short sessions beat occasional long ones every time.
Building Muscle Memory Through Focused Repetition
Building muscle memory through focused repetition is the core of skill development.
The key word is “focused.” Mindless repetition builds bad habits as easily as good ones.
Quality repetition looks like this: a shot with proper mechanics, immediate feedback on accuracy, a small adjustment, and repeat.
This is why shooting lane training benefits youth players so dramatically. Pro Stride Hockey’s training aids are designed to facilitate this exact type of deliberate practice.
Aim for 50-100 quality repetitions per session, enough to reinforce the pattern without fatigue degrading technique.
Muscle memory develops through consistent, focused repetition with immediate feedback. Shooting lane training creates the perfect environment for this kind of deliberate practice.
Measuring Progress and Transferring Skills to Game Performance
Measuring progress keeps young players motivated and shows whether training is working. A simple, repeatable benchmark set that a parent or coach can record in under five minutes per session removes the guesswork.
Four Benchmarks Worth Tracking
Track the same four numbers every week so trends become visible:
- Accuracy percentage: shots on target divided by total shots. Use a fixed target size and distance for the test so the number is comparable week to week.
- Release time: how long from receiving the puck to the puck leaving the stick. A simple phone timer or a partner with a stopwatch works. Most youth players see release time drop over a few weeks of focused repetition.
- Shot volume: total quality reps completed per session. Aim for 50-100 quality reps, and note when fatigue starts to degrade technique.
Record these in a notebook or spreadsheet. When a player sees accuracy climb from 40% to 60% over four weeks, motivation skyrockets, and the data tells you whether to add difficulty or repeat the drill.
A Simple Weekly Test
Set up one standardized test at the end of each week: 20 shots from a fixed distance at a fixed target size. Record accuracy, average release time, and the best-to-worst block gap. Keep the setup identical every week so the numbers mean something. Change one variable at a time, distance, target size, or time pressure, only after two weeks of stable results.
Closing the Gap to Game Performance
The real test is transfer to games. A player might shoot 70% accuracy in the training lane but struggle in games where there’s pressure, movement, and defenders. This gap is normal. Close it by gradually adding game-realistic elements to training:
- Static targets in the lane with no pressure.
- Time pressure, a clock counting down before the shot must leave the stick.
- Decision rules, shoot high on the forehand, low on the backhand, based on a cue.
- Off-movement shooting, receive a pass while moving, then shoot.
- Simulated defenders, a partner or barrier that forces the player to change the shooting lane before releasing.
Track game performance alongside lane performance. When a player’s shot accuracy improves in games, the training transferred. When it doesn’t, add more game-realistic elements rather than more reps of the same static drill.
Track accuracy, release time, shot volume, and consistency every week with a standardized test. Then progress from static targets to game-realistic decision-making, and compare lane numbers to game numbers to confirm the training transferred.
Frequently Asked Questions
What are the benefits of off-ice shooting practice for youth hockey players?
Off-ice shooting practice builds shot accuracy, increases shot power, and develops quick release through focused repetition in a controlled environment. Youth players benefit from reduced distractions, allowing them to focus on shooting mechanics without the pressure and chaos of game speed. Regular off-ice work also strengthens the muscle memory needed to execute shots consistently during competition, improving both confidence and performance when it matters most.
How can a shooting lane help a young player improve shot accuracy?
A shooting lane provides visual targets and a defined training space that reinforces shot placement and consistency. By practicing in the same environment repeatedly, young players develop familiarity with distance, angles, and target zones. The lane isolates shooting skill from skating speed and defensive pressure, allowing players to concentrate on technique. Over time, this focused practice translates to better accuracy in games when players face live defenders and must make split-second decisions.
How often should youth hockey players practice shooting off the ice?
The ideal frequency depends on competitive level and goals, but youth players benefit from 2-4 focused shooting sessions per week. Sessions should last 20-40 minutes, emphasizing quality repetition over volume. Consistent, shorter sessions build muscle memory more effectively than occasional long practices. Recovery time between sessions is important to prevent overuse and maintain skill development. Starting with 2 sessions weekly and adjusting based on progress and schedule allows players to build habits without burnout.
What equipment does a youth hockey player need for a home shooting lane?
A basic home shooting lane requires a stick, pucks or training balls, targets or a net, and a smooth, flat surface like a basement floor, driveway, or garage. Targets can be simple (cones, tape markers) or purchased training aids. Protective equipment like shin pads and gloves is recommended to prevent injury during practice. A ball return or barrier helps contain pucks and keeps practice efficient. Many youth players start with minimal equipment and upgrade as they progress, making home practice accessible regardless of budget. Pro Stride Hockey offers a range of essential training equipment to get started.