Last Updated: November 14, 2026
Quick Summary
Personalized hockey training plans for siblings give each child a track matched to their own skill, age and goals while sharing one family schedule. Start with a short five-part baseline for each child, then re-test every four weeks to move them up or down a level.
- Run a five-part baseline for each child on separate days to set their own starting point.
- Translate baseline results into beginner, intermediate or advanced levels for each skill area.
- Re-test every four weeks using the same five tests to adjust levels.
- Run joint sessions with two stations, rotating every 10 to 15 minutes.
- Keep younger players’ sessions to about 45 minutes and never stack hard sessions around games.
Table of Contents
- Why Siblings Need Personalized Hockey Training Plans
- Assessing Each Sibling Before You Build the Plan
- Step-by-Step: Building a Dual-Age Hockey Training Plan
- Scaling Drills for Different Skill Levels
- Joint Sessions With Individual Progressions
- Keeping Sibling Training Fair, Fun and Manageable
- Off-Ice Equipment Checklist and Your First Week Schedule
- Frequently Asked Questions
Why Siblings Need Personalized Hockey Training Plans
Two kids in the same house can play hockey at very different levels. An older brother might be ready for harder shooting drills while his younger sister is still building her stride. A single generic plan rarely fits both.
Personalized hockey training plans for siblings work because they respect those differences. Each child gets reps that challenge them without overwhelming them. The family also keeps one routine instead of juggling two separate calendars.
- Each child trains at a level that fits their skills
- Older and younger players stay motivated by different goals
- One shared schedule saves time for busy parents
- Progress is easier to track when each child has a clear plan
Think of it as one family routine with two individual tracks. That is the core idea behind this guide.
Assessing Each Sibling Before You Build the Plan
Most plans fail because they start with drills instead of a baseline. Before you write a single session, run each child through a short, repeatable assessment so you have numbers to compare against in four weeks. The goal is not to rank the siblings against each other.
Set aside 20 to 30 minutes per child, ideally on separate days so neither feels watched by the other. Use the same tests, in the same order, on the same surface each time you re-test. A driveway, a basement shooting area, or a dryland space with a skating treadmill all work; just keep it consistent.
A Five-Part Baseline You Can Run at Home
Run these five tests and record a number or a short note for each. Keep one sheet per child.
- Stride and push-off (skating treadmill or dryland stride): Count the number of strides it takes to cover a set distance at a steady effort, and note whether the push goes out wide or stays short. On a skating treadmill, watch for full extension and a clean recovery under the body.
- Single-leg balance: Time how long each child can hold a low, stable one-foot position. Note the weaker leg.
- Puck or ring control: Set five cones in a line and time a controlled weave, counting any knocked cones. For ringette players, run the same weave with a ring and ringette stick so the assessment matches their sport.
- Shooting form and release: Take ten shots at a target from a fixed distance. Record how many hit the target and whether the blade stays square through the follow-through. For ringette, assess the ring release and accuracy the same way.
- Work capacity and confidence: Note how many quality reps the child completes before form breaks down, and whether they attempt new drills willingly or hang back.
Turning Notes Into Levels
Translate each result into a simple level so the plan writes itself:
- Beginner: Form breaks down quickly, balance is under a few seconds per side, or the child hesitates on new drills. Keep reps short and focus on one cue at a time.
- Intermediate: Form holds for most reps and the child can add a moving puck or ring. Add a pass or a change of direction before the shot.
- Advanced: Form holds under speed and the child hits targets consistently. Add quick release, tighter targets, and faster tempo.
A child can sit at different levels in different areas. One sibling might be advanced in shooting but beginner in stride. That is normal and is exactly why a single family plan needs two tracks.
Watch out: do not let one sibling’s results become the other’s benchmark. Compare each child only to their own last test, and keep the sheets private if comparisons start to sting.
Re-test every four weeks using the same five tests. Kids change fast, and a plan built on last month’s numbers goes stale quickly. The re-test also gives you an honest reason to move a child up or down a level instead of guessing.
Step-by-Step: Building a Dual-Age Hockey Training Plan
A dual-age plan has two tracks that run on the same schedule. Follow these steps in order.
- Set the shared goals. Pick one or two family-wide goals, such as training three times a week.
- Set individual goals. Give each child one skating goal and one shooting goal.
- Pick drills for each track. Match the drill difficulty to each child’s assessment.
- Line up the sessions. Put the two tracks in the same time slot where possible.
- Plan progressions. Decide when each child moves to the next level.
- Review every four weeks. Adjust drills, time, or goals based on results.
Setting Shared and Individual Goals
Shared goals keep the family working as a team. Individual goals keep each child focused on their own growth.
- Shared goal example: Train together three evenings a week
- Individual goal example (older child): Improve first-step acceleration
- Individual goal example (younger child): Keep the stride wide and controlled
Keep goals measurable. “Get faster” is hard to check. “Skate the length of the rink in a set number of strides” is easy to track.
Choosing Off-Ice Drills for Skating and Shooting
Off-ice work builds the strength and technique that carry over to the ice. If you want local options, browse hockey shooting lane facilities in Edmonton for shooting lane training. A skating treadmill is useful here because it lets a child focus on stride mechanics without fatigue from the full session. Read this skating treadmill review for hockey players to understand how it supports stride work. A skating treadmill can be used to teach stride efficiency, and the same principles apply at home. Explore top skating power exercises for hockey to see drills that build a stronger stride.
Choose drills that suit each child:
- Stride drills for balance and push-off power
- Stickhandling and shooting drills with a target
- Short bursts of speed work with rest between reps
Keep each drill short and focused.
Scaling Drills for Different Skill Levels
The same drill can work for both siblings if you change the difficulty. This saves time and keeps the sessions together.
Here is how to scale a basic shooting drill:
| Level | Drill Setup | What Changes |
|---|---|---|
| Beginner | Stationary puck, slow wrist shot | Focus on form |
| Intermediate | Puck moving, one-touch pass first | Add a pass before the shot |
| Advanced | Quick release off a pass, target zones | Add speed and accuracy goals |
Use the same cones, targets and timing for both children. Just change the reps, the distance or the speed. The older child can run the advanced version while the younger one runs the beginner version, all in the same block of time.
Watch each child closely and move them up only when their form holds steady.
Joint Sessions With Individual Progressions
Joint sessions are where the plan comes together. Both siblings train in the same space at the same time, but each follows their own progression.
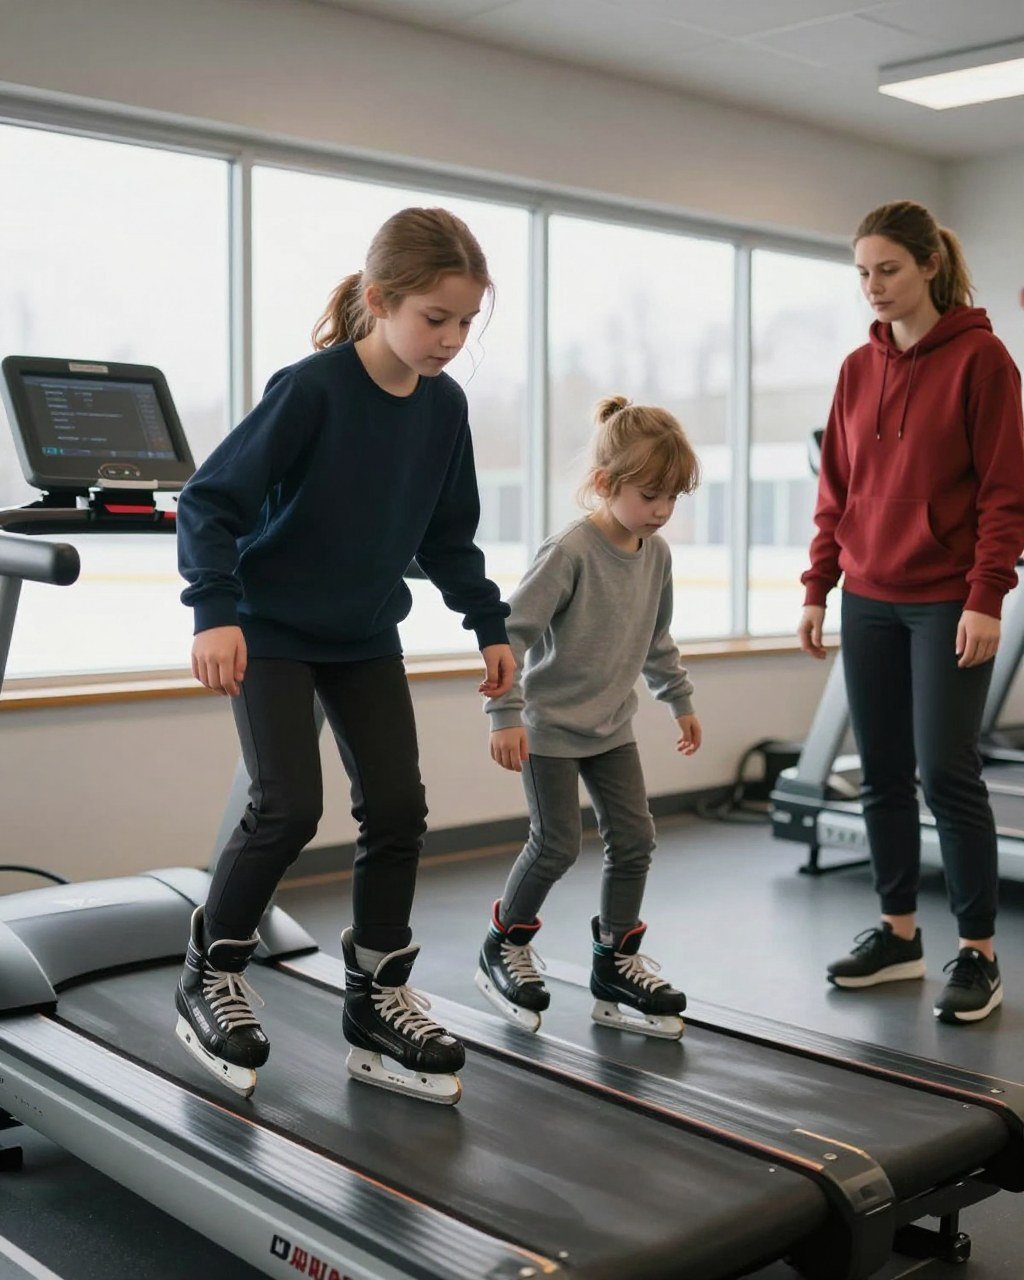
Set up two stations in the same area. One child works through stride drills while the other works on shooting. Then switch. This keeps both kids busy and gives you a chance to coach each one.
- Rotate stations every 10 to 15 minutes
- Give each child their own target or score
- End with one short drill they both do together
Joint sessions also build teamwork. Kids learn to cheer each other on, and they see their sibling’s progress up close.
Keeping Sibling Training Fair, Fun and Manageable
Sibling training can go wrong if one child feels left behind or pushed too hard. Keep it fair by using the same rules for both kids and praising effort, not just results.
A few habits help:
- Let each child pick one drill per session
- Celebrate small wins for both kids in the same way
- Avoid comparing their times or scores out loud
- Build in rest days for both children
Keep sessions short enough that kids stay engaged. Forty-five minutes is often plenty for younger players. Watch for signs of fatigue or frustration, and adjust the plan when you see them.
Parents coaching their own children should keep the tone calm and supportive. A relaxed session often produces better skills than a tense one.
Off-Ice Equipment Checklist and Your First Week Schedule
A sibling plan only works if the week actually fits around school, team practices, and recovery. Gather the gear first, then build a calendar that both children can live with.
Off-Ice Equipment Checklist
You do not need much, but match the gear to each child’s sport and size.
- Cones or markers for stations and the weave test
- A hockey stick sized for each child, plus a ringette stick for ringette players
- Pucks for hockey players and rings for ringette players
- A target or net for shooting practice
- A timer or stopwatch for drill blocks and rest intervals
- A notebook or printed sheet to log each child’s baseline and weekly results
- A skating treadmill session slot if you have access, since stride work is where technique improves fastest
- Water bottles and a clear rest area
A Sample Week That Fits Real Family Life
Build the week around fixed commitments first: school, team practices, and games. Then slot shared off-ice sessions into the gaps. A workable pattern for most families is two or three short off-ice sessions plus one skating treadmill slot per child, with at least two full rest days.
Here is a sample week you can shift to fit your calendar:
- Day 1: Baseline assessment for the older child (20 to 30 minutes). Light stretching for the younger one.
- Day 2: Baseline assessment for the younger child. Set shared and individual goals afterward.
- Day 3: First joint session, two stations, 10 to 15 minutes per station. Keep total time to about 45 minutes for younger players.
- Day 4: Rest or light mobility work.
- Day 5: Skating treadmill slot focused on stride technique for each child, short and focused.
- Day 6: Second joint session. Log results and note where form held.
- Day 7: Rest.
Workload and Recovery Rules of Thumb
Keep total weekly off-ice time modest, especially in season. A common pattern is 45 to 60 minutes per session for younger players and up to 75 minutes for older ones, with rest between hard efforts.
Watch out: two siblings on different team schedules can quietly double a family’s training load. Count team practices and games as training, and drop an off-ice session when the week is already full.
After the first week, review the notes and move each child up or down a level based on their own results.
Frequently Asked Questions
How can siblings with different hockey skill levels train together?
Siblings can share the same session structure while using different drill versions. Run a common warm-up and a shared skill station, then split the work by level: the older or more advanced child takes longer intervals, harder stride drills, or faster shooting targets, while the younger child works on the same movement with reduced speed, shorter reps, and more rest. Keeping the session framework identical makes it easier to manage time and keeps both children feeling included in the same activity.
How often should youth hockey players do off-ice training?
Most young players do well with two to three off-ice sessions per week alongside their regular ice schedule, with at least one rest day between harder sessions. Shorter, focused sessions usually produce better skating and shooting technique than long, tired ones. For siblings, a reasonable starting point is to alternate days so each child has a clear recovery window and parents can supervise without overloading the family schedule.
Can siblings follow the same hockey workout?
Yes, as long as the workout is adapted for each child’s age, strength, and skill. Siblings can complete the same stride, shooting, and balance drills, but the older child may use more repetitions, a faster pace, or added resistance while the younger child focuses on form and control. Tracking each child’s progress separately helps you see who is ready for a progression and who needs more time on the basics.
