Last Updated: November 15, 2026
Quick Summary
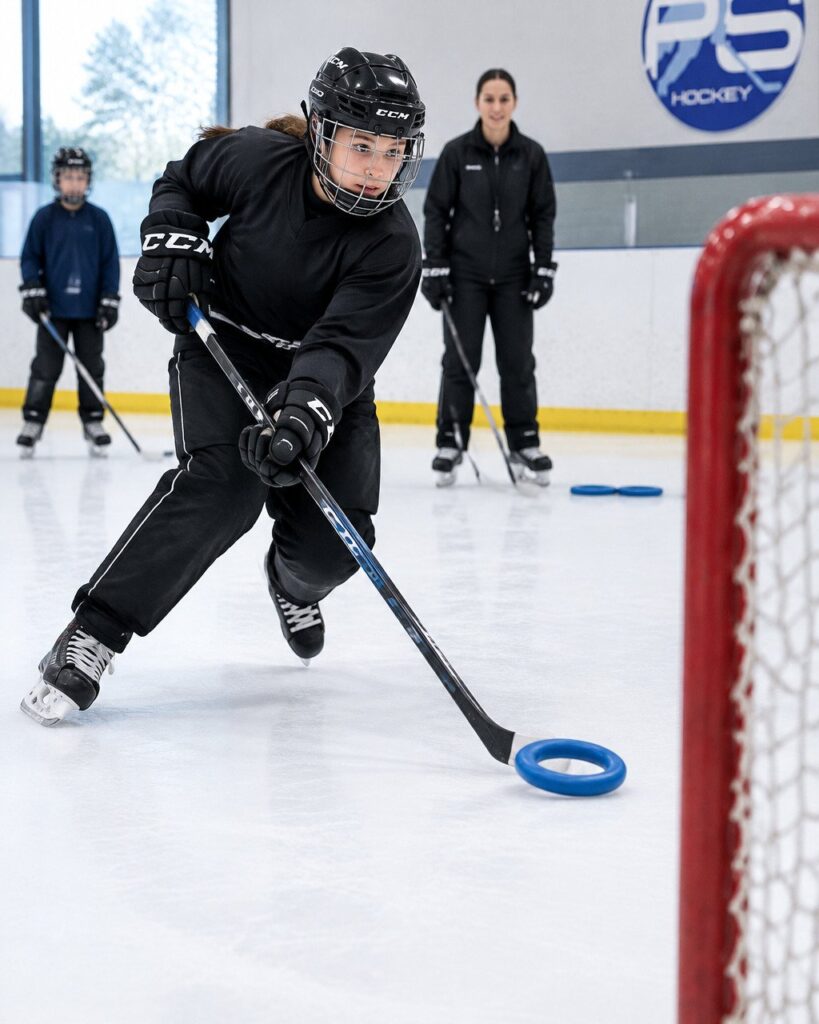
The ringette shooting technique is built on a relaxed grip, a low balanced stance, and a wrist shot that transfers weight forward and releases the ring at the peak of a smooth lift. Practising each step slowly before adding speed produces a shot that is accurate and repeatable.
- Keep feet about shoulder-width apart with knees slightly bent for balance.
- Start the ring lift with your wrists, not your shoulders.
- Hold the stick tip steady until the ring leaves the blade.
- Track target hits out of 20 shots to measure progress in each session.
- Practise shooting in a safe space with at least three meters of clear space behind the target.
Table of Contents
- Why Shooting Technique Decides Your Scoring
- Grip, Stance and Stick Positioning
- The Wrist Shot Step by Step
- Off-Ice Drills for Ringette Shooting Practice
- A Progressive Practice Plan With Milestones
- Troubleshooting Common Shooting Errors
- Booking Your Next Session at Pro Stride Hockey
- Frequently Asked Questions
Why Shooting Technique Decides Your Scoring
Scoring in ringette comes down to one thing: mastering the ringette shooting technique for a clean, accurate release. Players who can place the ring on target under pressure get more chances to win games. Players who rely on raw power often miss the net, even when they have the strength to fire hard.
Shooting can be built step by step, with drills that reinforce the same movements players use in games. The result is a shot that is repeatable, not just powerful.
Good technique does three things. A solid ringette shooting technique makes your shot more accurate, faster to get off, and lets you shoot the same way every time.
- Accuracy: the ring goes where you aim it
- Speed: you release before defenders close in
- Consistency: your shot looks the same in practice and in games
Grip, Stance and Stick Positioning
Your grip and stance set up everything that follows. Start with a relaxed grip on the stick, with your top hand near the top of the shaft and your bottom hand lower down. Hold the stick loosely enough that your wrists can turn freely.
Keep your feet about shoulder-width apart. Bend your knees slightly so your weight sits low and centred. This stance gives you balance and makes it easier to transfer weight into the shot.
Position the stick so the blade lies flat behind the ring. The tip should point toward your target. Many players hold the stick too far forward or too far back, which changes the angle of the release and throws off accuracy.
The Wrist Shot Step by Step
The wrist shot is the foundation of ringette shooting. It is quick, controlled, and works well in tight spaces. Break it into clear steps, then practise each one slowly before adding speed.
- Set your stance. Feet apart, knees bent, weight balanced.
- Load the ring. Pull the stick back slightly so the blade stays low and the ring rests on the blade.
- Transfer weight. Shift your weight from your back foot to your front foot as you move forward.
- Turn your wrists. Roll your top hand over as the stick moves through the release point.
- Follow through. Let the stick point at the target and finish with your hands moving toward it.
Keep the stick tip low through most of the motion. A low tip helps keep the ring under control.
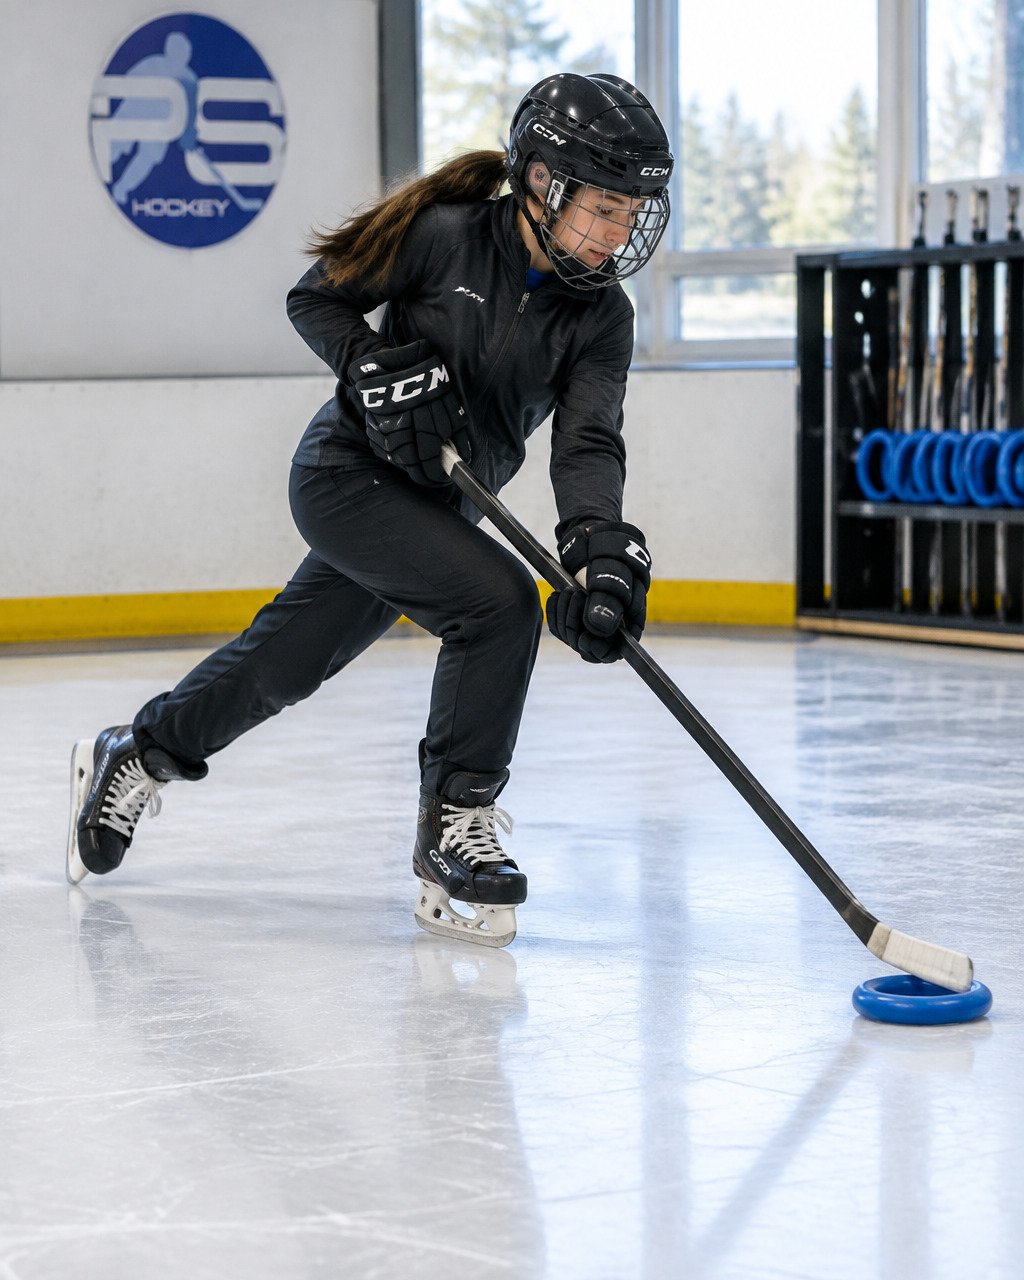
Lifting the Ring and Releasing the Shot
The release is where many shots go wrong. Players who lift the ring too early lose control, and players who wait too long lose speed. The goal is a smooth lift that ends just before the release.
Start the lift with your wrists, not your shoulders. Keep the ring on the blade as you raise it slightly. Release the ring at the peak of the lift, while your weight is moving forward.
A common mistake is dropping the stick tip right before the release. This pulls the ring down and sends it wide. Hold the tip steady until the ring leaves the blade.
Forehand Shooting and Low Versus High Placement
The forehand shot works when the ring comes to your strong side. Your body turns, your hands stay close together, and you push the stick through the target in one smooth movement.
For low shots, keep the ring close to the ice and aim for the lower part of the net. For high shots, lift the ring a bit more and use your wrists to send it upward. Most players find low shots easier to control and high shots harder to hit cleanly.
Off-Ice Drills for Ringette Shooting Practice
Off-ice shooting practice works best when the space is set up before the first shot. A few minutes of preparation prevents most injuries and makes every rep count.
Set up a safe shooting space. Use a flat, dry surface with at least three meters of clear space behind the target and two meters on each side of your stance. A driveway, garage, or empty training room works. Place a tarp or shooting pad behind the target to catch rings and stop rebound bounce-back. Never shoot toward a door, window, or walkway. Check that the target is secured so it cannot tip forward.
Choose the right ring and stick. Use a ringette ring that is in good condition, with no cracks or soft spots. A cracked ring flies unpredictably and can catch the blade. Use a ringette stick, not a hockey stick. Check the stick tape and blade for wear before each session.
Measure every drill. Pick one simple score for the session, such as target hits out of ten shots from a set distance. Record it after each drill so you can compare sessions. A common pattern is that players improve target-hit rate before they improve release speed, so track both separately.
- Target toss: Place a target on the wall at chest height and take 20 shots from three meters, focusing on the same release each time. Score: hits out of 20.
- Stance check: Shoot slowly in front of a mirror or phone camera to check knee bend and weight transfer. Score: number of reps where your front knee stays bent through release.
- Low and high rotation: Alternate between a low target at knee height and a high target at chest height for 10 minutes. Score: hits per target zone.
- Forehand reps: Practise forehand shots from the same spot, then move one step to each side. Score: hits out of 10 from each spot.
- Quick release: Have a partner roll or slide the ring to you and shoot within two seconds of receiving it. Score: clean releases out of 10.
Watch out: shooting on a slick garage floor without a shooting pad can cause the stick blade to slip and the ring to bounce unpredictably, so use a textured pad or a dry driveway surface.
To find a session that fits your schedule, see our indoor hockey shooting lane training program for continued work on these drills.
A Progressive Practice Plan With Milestones
Improvement comes faster when you track progress and adjust the plan to the player. Use this four-week plan as a guide, adjusting session length and frequency to the player. Keep a simple log of target hits, release time, and how the shot felt.
Week 1: Stance and grip
- Practise setup for 10 minutes per session, then take 10 slow shots.
- Milestone: hold the correct stance for 30 seconds without adjusting, and complete 10 slow shots with the stick tip low.
- Diagnostic: if the player loses balance, widen the feet slightly and check that the knees stay bent.
Week 2: Wrist shot mechanics
- Take 30 slow shots per session at a steady pace, alternating forehand and low targets.
- Milestone: hit a target 7 out of 10 times at low speed.
- Diagnostic: if shots go wide, check that the stick tip stays pointed at the target through release.
Week 3: Speed and accuracy
- Add speed while keeping the release consistent. Take 20 shots at full speed, then 10 at low speed to reset mechanics.
- Milestone: hit the target 6 out of 10 times at full speed.
- Diagnostic: if accuracy drops sharply at speed, reduce speed for one session and rebuild the release.
Week 4: Game-like shooting
- Shoot from different spots, with a partner calling for the ring or sliding it to you. Include at least one shot while moving sideways.
- Milestone: release in under two seconds after receiving a pass, with 5 out of 10 shots on target.
- Diagnostic: if release time stays above two seconds, practise the receive-and-shoot motion without a target first.
Adapt the plan to the player. For younger or newer players, repeat each week twice before moving on and keep sessions to 15 minutes. For experienced players, add a fifth session focused on shooting while moving.
If you want structured shooting work, our Tim Turk shooting-only program follows a similar progression.
Troubleshooting Common Shooting Errors
Most shooting problems come from a few common causes. Fix the cause, and the shot usually improves.
- Shots go wide: The stick tip is probably drifting away from the target at release. Hold the tip steady longer.
- Shots go high: The ring is lifting too early. Keep it low until the release point.
- Shots lack power: Weight transfer is weak. Make sure your weight moves onto the front foot.
- Inconsistent shots: Your grip changes from one rep to the next. Set your hands the same way every time.
If errors persist, private hockey lessons in Edmonton offer one-on-one feedback on your mechanics. For more drill options that sharpen release accuracy under pressure, see our hockey shot accuracy drills.
Booking Your Next Session at Pro Stride Hockey
At Pro Stride Hockey, we offer a 2:1 player-to-coach ratio for one-on-one sessions and a maximum of four players per session. Our shooting lane facility and video analysis are available to help you review your release.
Browse our available sessions to find a time that works for you. Start building a shot you can rely on in every game. Book your session with Pro Stride Hockey and see the difference in your accuracy.
Frequently Asked Questions
How do you shoot a ring in ringette?
Start with the ring on the blade of the stick, keep your hands shoulder-width apart, and bend your knees so your weight sits over the front foot. Transfer weight forward as you push the stick toward the target, then release the ring with a smooth follow-through. Keep the stick tip low and aim with your head up. Practise the sequence slowly before adding speed, because a repeatable motion matters more than power when you are learning.
How can ringette players improve shooting accuracy?
Accuracy comes from a consistent stance, grip and release. Pick a fixed target on a wall or net, shoot the same number of repetitions each session, and track how many land on target. Focus on keeping the stick tip in line with the target through the release. Short, frequent sessions with a clear goal, such as ten shots hitting a box, build accuracy faster than long unfocused shooting.
Can you practise ringette shooting off the ice?
Yes. Off-ice practice with a stick and a ring on a clean, smooth surface lets you work on grip, stance, weight transfer and release without the pressure of a game. Use a target such as a bucket or a marked square on the floor. Always clear the area of breakables and make sure you have enough space.
How do young ringette players practise shooting safely at home?
Choose a clear area away from windows, furniture and other people, and keep shots at low height while learning. Wear eye protection if the space is tight or if other players are nearby. Warm up with easy stick handling first, and keep sessions short so technique does not break down from fatigue. Aim at a target placed on the floor or against a padded wall, and stop if the stick or ring is damaged.
